Have you ever been frustrated by clients saying they can’t squat because their knees hurt? Clients then point to their kneecaps. Unfortunately, the “no pain, no gain” strategy doesn’t work. The alternative seems to be eliminating provoking movements. No more squats, lunges, leg extensions, step ups… The zone of accessible movement continues to shrink. The shrinking movement zone leads to more compensation and imbalances in the gym and in real life. Fitness professionals, however, have the power to restore movement freedom. The key is moving beyond cookie-cutter corrective exercises to individualize program design fast. Follow this guide to help fine-tune kneecap restoring routines.

Start Here: Pinpoint the Problem
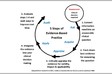
Ever heard the phrase, “Don’t address what hasn’t been assessed?” A quick 3-step assessment can guide you to helpful solutions faster than guessing.
Step 1 – Screen for Inflammation: Ask the client when they have pain. If pain is at rest or only while descending into greater knee flexion (i.e., going downstairs), inflammation is part of the problem. If the client is under medical care or has yet to be diagnosed, include the medical team.
Step 2 – Screen Biomechanics: Ask the client to perform 20 bodyweight squats (scaled to their abilities). Watch for the most common deviations: arches flattening, shins remaining too vertical, knees caving inward, lack of an effective hip hinge, lateral hip shift, or ribs sticking out. If able, have the client repeat 20 reps as quickly as possible. Many times, speed and fatigue will allow more subtle deviations to surface. If the bilateral stance is unremarkable, try a unilateral 6-8-inch step-down progression. If the pain is only with a specific movement like running, progress to an activity-specific biomechanics analysis.
Step 3 – Screen Tissue Tolerance: For clients who don’t have pain tied to a specific movement pattern, ask how long they can do the activity without pain. For clients with pain only after some considerable activity duration, the tissue is not ready for the specific intensity or volume. No amount of essential corrective exercise will overcome this challenge.
Create the Plan: Target the Issue
At this point, you know if the client is more bothered by inflammation, biomechanical movement deviations or tissue tolerance. Use the guide below to devise a solution.
Problem 1: Inflammation
Clients with pain at rest or only on loading into knee flexion usually have an inflammation control issue. Calming inflammation starts with PRICE: protect, rest, ice, compress and elevate. PRICE options are as unique as clients. Take a moment to help coach clients on how PRICE can be part of their lifestyles. Ice, however, is only effective for new inflammation. If the issue is long-standing, try a warm-up instead. Warm-ups can be active, like stationary biking, or passive, like a sauna.
Clients with inflammation often do not need to avoid the knees altogether. After checking with the client’s medical team, most clients are cleared for knee cap mobilizations and isometrics. Both of these activities can help decrease inflammation. Here’s how to perform each exercise:
Kneecap Mobilization
Have the client in long sitting with the knees slightly bent. Show the client how to position their fingers on the four corners of the kneecap. Have them gently move their kneecap a few millimeters up and down for a minute. Repeat in a gentle side-to-side motion. This valuable motion is often overlooked because clients don’t feel like they are working. Kneecap mobilization, however, can decrease inflammation as a kneecap warm-up before activity.
Isometrics
Since isometrics don’t move joints through large quantities of motion, they can effectively activate muscle without increasing inflammation. Quad sets are one of the most common helpful exercises. Quad sets teach the kneecap to move correctly as the knee extends and relaxes. Many clients struggle with this exercise because they do not perform it correctly. Try the following cues to help: Begin in the same position as for kneecap mobilization. Tighten the quad to make the kneecap glide “up” the thigh. Many clients will try to hyperextend the knee, which is more likely to increase pain. When clients learn to activate their quads while pulling the kneecap up toward the hip, they learn an essential skill to help decrease inflammation and re-establish essential mechanics for more common gym exercises. Once the client understands the movement, have them repeat 10 reps several times each day. Once they master the sitting position, progress to standing on two legs, then standing on one leg.
Problem 2: Biomechanics
Resolving biomechanical issues involves inhibiting and stretching overactive muscles, strengthening inhibited muscles and re-teaching movement patterns. Check out the quick reference table for common corrective exercises based on specific movement issues.
When re-teaching movement patterns, cues are key. When using verbal cues, try cueing for the positive by telling clients what you want them to do. For example, instead of saying, “Don’t let your knees cave in,” try “keep your knees pointing forward like headlights on a car.” When using visual cues, incorporate mirrors or video feedback. Video can be a beneficial coaching tool. As you watch a video playback with a client, you can help them develop movement autonomy by asking the client what feedback they would give themselves first. Tactile cues are also essential to helping clients feel the proper movement patterns. For example, if a client holds their shins too vertically when squatting or stepping, place a foam roller in front of the client and cue “touch your knee to the roller.”
Problem 3: Tissue tolerance
When tissues become fatigued beyond their conditioning level, they respond with pain. Re-conditioning tolerance requires stepping back in volume and intensity to rebuild. This does not imply more rest days, but rather replacing repetitively stressful activities with activities that do not stress the front of the knee day after day. The solution for those who love resistance training may be adding additional splits. For example, if someone is on a rotation to alternate upper body and lower body, sub-divide the lower body split into four days: anterior loading, posterior loading, lateral loading and single leg. Rotate through the four days over the client’s training month. For those who love cardio, add different modes within one workout. For example, include elliptical, circuit training and upper body rowing ergometers instead of just biking. The varying angles will help stimulate different muscle fibers and connective tissue lines of pull to increase movement options. Adding a day of yoga or mobility work provides a much-needed active recovery for those who don’t stretch regularly.
Next Steps
If you have clients who feel limited by kneecap pain, try the program design tips above to help them expand their zones of movement capability. As you explore new options, remember that clients are not textbooks. Promoting individualized movement patterns will create more possibilities than emphasizing textbook movement perfection.
Dr. Meredith Butulis, DPT, OCS, CEP, CSCS, CPT, PES, CES, BCS, Pilates-certified, Yoga-certified, has been working in the fitness and rehabilitation fields since 1998. She is the creator of the Fitness Comeback Coaching Certification, author of the Mobility | Stability Equation series, Host of the “Fitness Comeback Coaching Podcast,” and Assistant Professor the State College of Florida. She shares her background to help us reflect on our professional fitness practices from new perspectives that can help us all grow together in the industry. Instagram: @doc.mnb